Printing Sewing Patterns – Part 2

sewing machine blue

Pattern Sewing


Announcing our new feature for all those seamsters and seamstresses out there (new sewing pattern printing custom sizing).  Tired of taping 8.5x11s together?  We wanted to let you know about some of the new features and benefits of using Blueprints Printing for your sewing patterns.  When purchasing patterns online, many sites now offer a “copy shop” version of the pattern, typically a large format print.  This can save you so much time in your sewing, and there is something to be said for instant gratification.  Taping together patterns can take time and energy away from your actual sewing project.

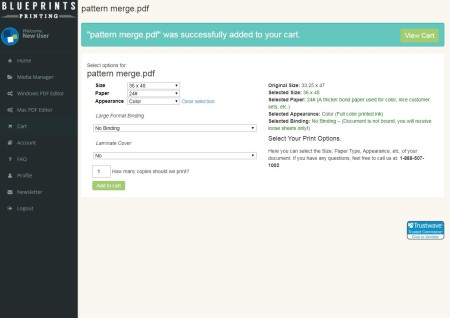
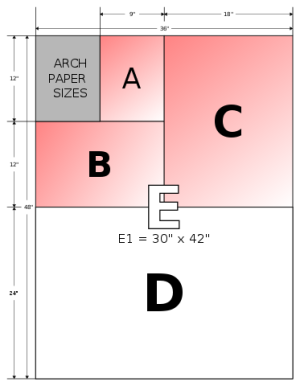
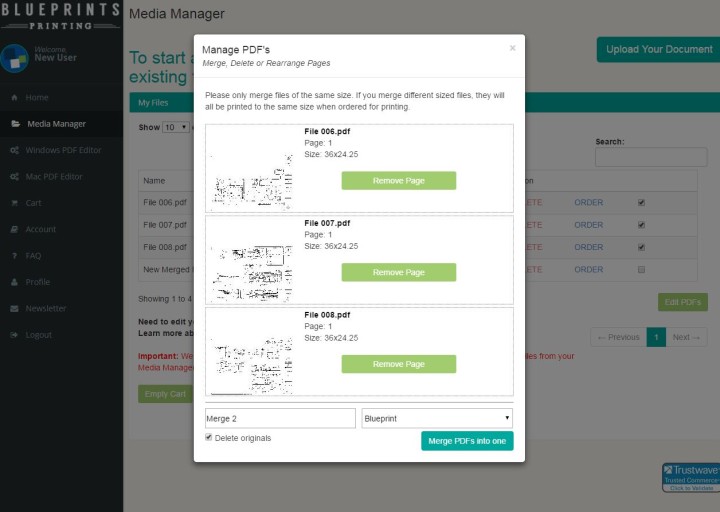
We have developed some new features for printing patterns.  First is a new “Custom Size” option.  You can now pick the custom sizing and print at any length, tell us exactly what you want, and even cut it to size if you want.  Wedding dresses, full length gowns, and costumes can as much as 8 ft long!  Using the new custom sizing options, you no longer have to wait for customer service to order patterns.  Instead, the process is now seamless without having to speak to a representative.  Just look at the size on the right, when you are ordering, and the system will tell you what size to pick for your print.

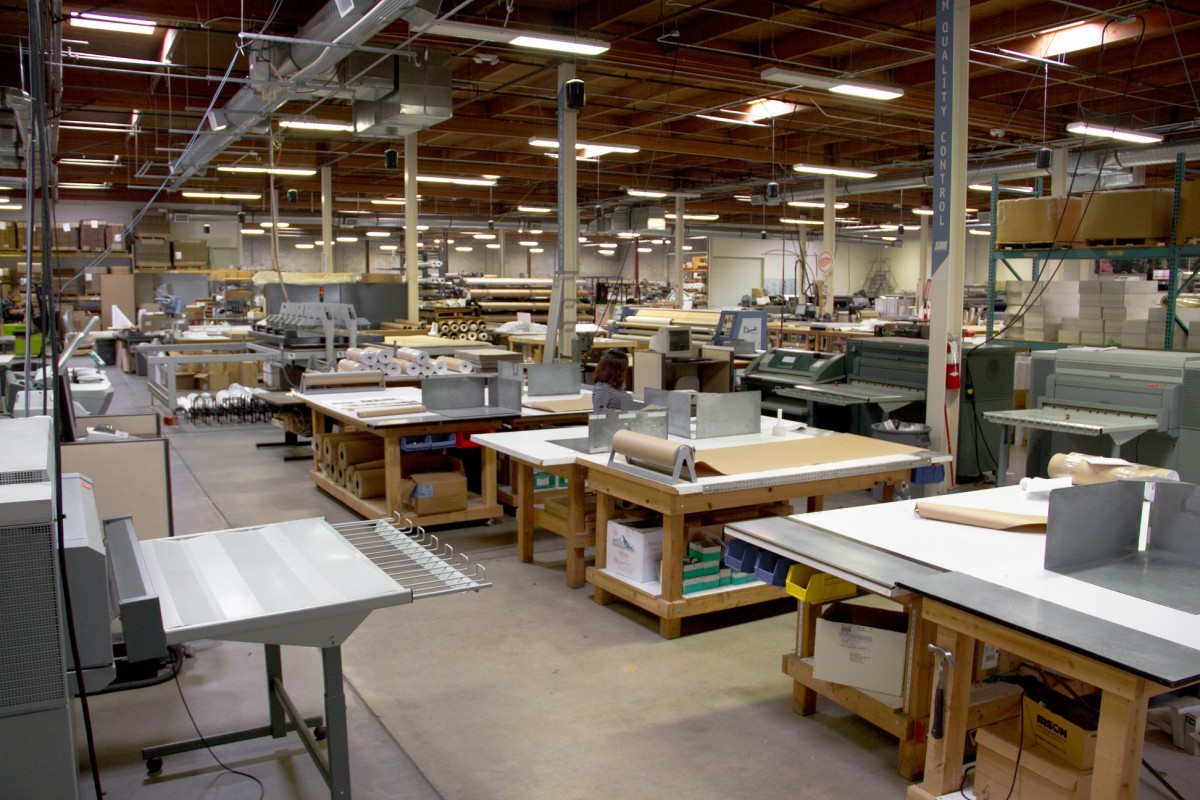
Second, we have also added print floors to our system, printing in Jacksonville, FL; Las Vegas, NV; and Waco, TX.  This puts the print floor closer to you, which means with the same shipping you get the prints days earlier.

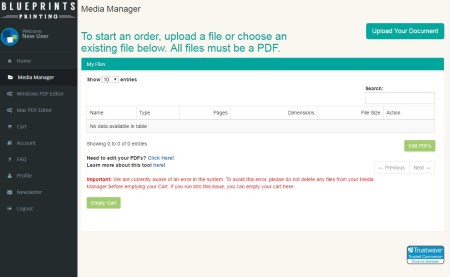
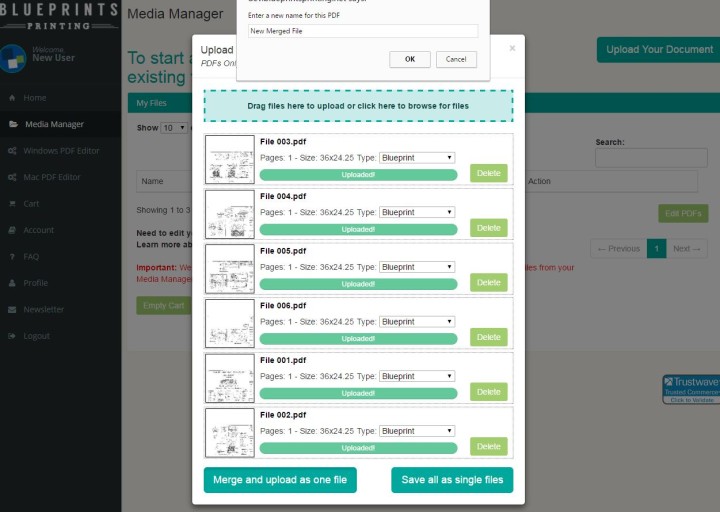
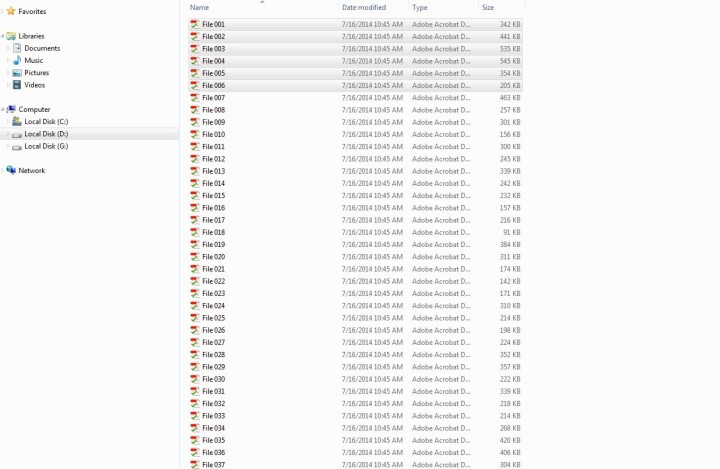
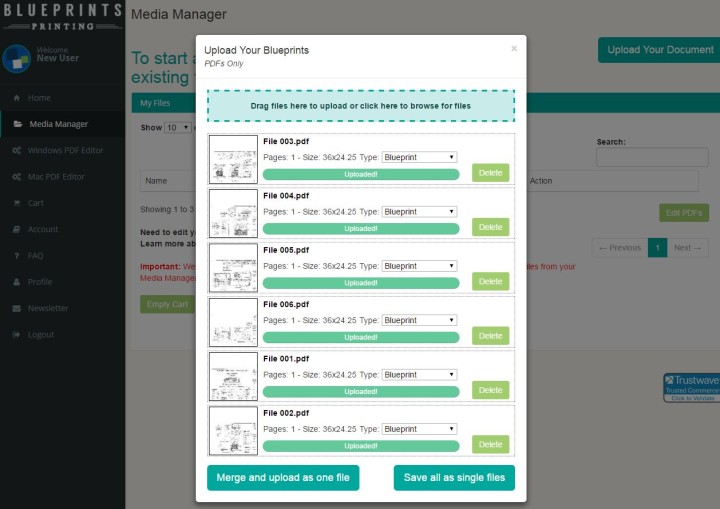
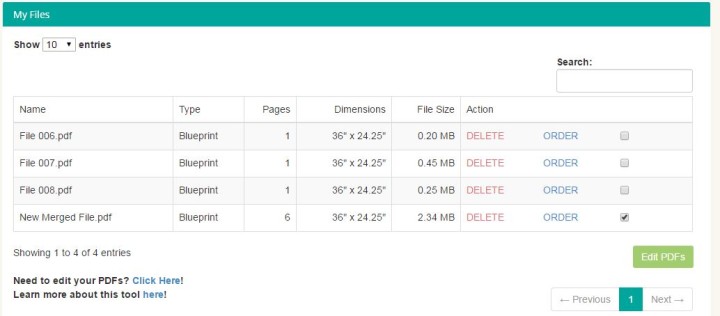
Third, we also created a tutorial to let you know how to print your patterns.  Originally created for Patterns for Pirates, this tutorial walks you through how to upload your files, print, and ship!  It makes printing sewing patterns easy for you to do, right from your desk, late at night when the owls are hooting in the trees… if that is your favorite time of day.  We want the process to be painless, in whatever way we can make it.  At only $0.16 per square foot per custom print, we can keep the costs in line with your budget.

Custom Sizing

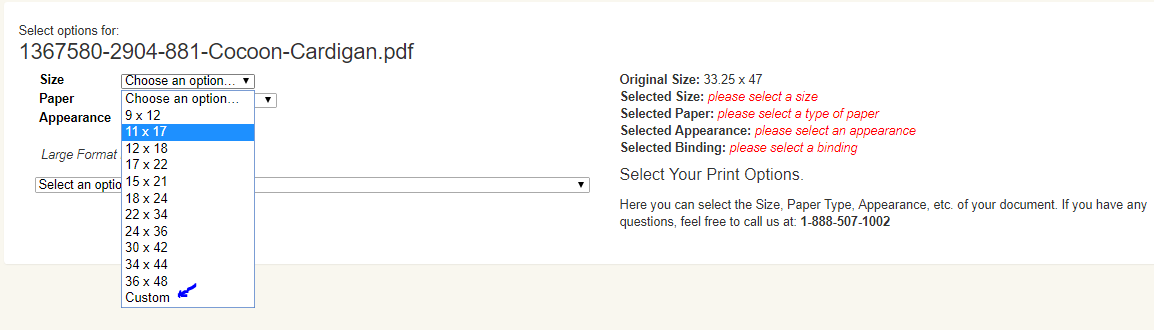
New Feature – Custom Sizing

We are always willing to help with any questions, so please don’t hesitate to call when ordering.  888.507.1002

The Latest Newsletter Is Out

The latest newsletter with a coupon for the summer build season is out!  Please check it out here!

Streamline Your Workflow – 2 of 3 – Color and Tyvek

In this second part of this series, how can you help your team be more efficient when on the job site?

One of the many types of prints that we offer are color prints and Tyvek prints.  Let’s talk about how this can improve your workflow and build accuracy.

Color for Clarity

When jobs are given out to construction companies, typically, there are many building disciplines that have to overlap with each other to get the job done.  With color printing, seeing how the individual pieces overlap (ex. how plumbing in the walls must coincide with electrical or mechanical) can be critical.  In a recent study, drawings were presented in black and white to project managers, electricians, and plumbers.  They were asked to point out major elements for bid and construction in the drawings.  In nearly 85% of the cases several key items were missed amounting to thousands of dollars.  In one case a whole set of bathroom plumbing fixtures were missed because of the way that black and white shows on a page.  When different groups were shown the same plans in color, the errors in bidding and construction dropped by 75%.

In a different study, there was an estimate that for every $1 spent in color printing, the construction project could save $4.  That is a 1:4 ratio of cost versus accuracy.  This is roughly in line with the study noted above.  Those are big numbers.  When all the disciplines are able to see their portion in context, the rate of deviation from the drawings drops substantially.  Most CAD drawings are already native color drawings.  Ask your architect to provide you with color CAD and print online with us.  We have great pricing on color.

Tyvek for Longevity and Redlines

Redlines are part of every job.  RFI’s, customer changes, and engineering and architectural addenda can all cause on-site drawings to change.  Most of the time, there is a lag between addenda and the actual job site plans.  Keeping these changes straight on the job site can be hard in environments where there is a lot of dust, metal shavings, dirt and mud, and even rain and snow.  Enter the Tyvek drawing.  Tyvek is an extremely durable, tear-resistant, and waterproof material.  We are able to print on Tyvek with waterproof, polymer “ink” that will last the entire job.  Since Tyvek will readily take permanent ink, redline drawings can be saved throughout the entire job.

When plans are taken from the job site trailer or Project Managers office, many times the plans will come back torn or stepped on, making them unreadable.  With Tyvek, you don’t have to be afraid to take the plans where they need to be.  Our Tyvek plans can be washed off with mild soap and water, won’t tear even in rough conditions, and are the perfect, long-term job site trailer set.  Since it is so durable, think about printing your common sheets (sheets that every discipline needs) on Tyvek.  This can save major time and hassle during the sign-off stage.  PS.  We can also print on Tyvek in color for a double-whammy of productivity gain.

Cost-Tracking Improvements

All our options can be ordered from our mobile-friendly website.  Missing pages or addenda, upload and print directly from your phone.  Your prints will be delivered in as quickly as 24 hours.  Job printing as a cost can be tracked right on your phone by pulling up the order.  No need to make a call to find out how much you spent on printing.

Check out this video on how we work.

Streamline Your Workflow – 1 of 3

How Much Is Your Time Worth?

We gain a lot of insight from our customers to see why they come to us.  Usually, this comes down to one of three reasons:  time, workflow, and money.  In this blog, we explore the time savings you can experience using our site.

The “old” way of ordering plans was to get a CD or email the set of plans to the local reprographer or copy shop.  This involves first gathering the plans together, whether they are in DropBox, Google Drive, or on a physical CD.  An email is then sent to the local shop.  If there is already agree upon pricing, a response saying the plans had been received would probably be emailed back.  Someone has to then pick up the completed plans.  If the plans are not done by the scheduled pickup time, then it may take two trips.  Let’s look at the time this takes.

  1. 1.  Gathering plans together – depending on the number of plans and whether they are collated, the amount of time it takes to get plans to the local copy shop can be short (minutes) to an hour or more to collate the plans.
  2. 2.  Waiting on a response – if the job is critical, there is usually some back checking to ensure that the plans have arrived, the plans are all together and all the information is there, and a wait time back and forth for response (minutes to an hour or more)
  3. 3.  Picking up the plans – whether the plans are delivered by the reprographer or someone is sent out to pick up the plans, this is usually a 25-minute to 2-hour process, depending on how big the city or town is. If the plans are not done, the process is repeated.  If the plans are delivered, a delivery fee is usually charged ($15 to $25).

One of the major reasons our customers switch is simple time savings.  Let’s look at where the time savings come in:

  1. 1.  Gather plans together – this is very much the same as gathering together the plans for the reprographer. We have tools on our web site to arrange the PDF as you need it.  These tools are available during upload and in your account in the Media Manager.  We have dedicated customer service people willing to answer any questions during this phase of the process.
  2. 2.  There is no waiting on a response with Blueprintsprinting.com. Your job is immediately sent to the print floor closest to your delivery address, and you receive a receipt that your job is in the queue.
  3. 3.  You don’t have to pick up plans. The plans are shipped.  Many areas of the country will get their prints the next business day!  Our typical turnaround time from job receipt to ready-to-ship is 2 hours!
  4. 4.  Job receipt, job completion, shipment tracking, and delivery tracking are all emailed to you directly. You are always aware of where your job is at any time!

When we compare these two scenarios, you could save 2 to 3 hours in your day.  Let’s look at this from a yearly standpoint.  If you need documents 1-2 times per week, that is 4 to 6 hours of unproductive time spent just simply trying to get the plans you need.  Over the course of a year, that is 80 to 120 hours, considering the normal construction schedule.  That’s two weeks a year that could be spent developing new business, getting other things done, or just having fun.

Here is Twitter comment from Brett:

“Recently placed 2 orders… not only were the prints of great quality, but they were completed and shipped much faster than I expected. They will definitely be getting more of my business!!!”

Even printing the plans in-house can cause workflow delays.  From a recent Twitter comment from Luke:

“I don’t share a lot of business shoutouts, but these guys deserve it. Affordable, fast, convenient, professional quality & best of all great customer service. Take back your time if you’re printing large format construction docs and go to @blueprintsprint [https://blueprintsprinting.com] ASAP.”

If you are packing and shipping jobs to your customers, consider that we can have multiple addressed documents going out to your customers within hours of job submittal.  How much time does it take to print and ship documents to your customers?

Take your time back!  Go to https://blueprintsprinting.com/account and upload your plans today.

Printing Sewing Patterns

There has been a remarkable revival in at-home sewing that has taken place over the last 5-10 years. Once thought to be struggling remnants of dying industries, fabric and sewing machine sales have rebounded sharply, as a new generation do-it-yourselfers, and folks just looking for a little individual flare to their clothing, have taken up the hobby of sewing at home. Modern day seamstresses and sewers are frequently purchasing their patterns from online designers who sell their custom clothing patterns as downloadable PDFs.  One very popular designer whom we have recently begun working with through an affiliate program is Judy Hale of Patterns For Pirates.  There are countless others.  Some time ago, a few of the P4P seamstresses discovered our large format printing services and realized we had the perfect way for them to get the easy-to-use large format A0 copy shop patterns printed and shipped to their doorstep. No more taping 8.5×11 inch sheets together from home office printers, and no more paying an arm and a leg for a few large format prints at the local print shop or retail office supply stores. We have been printing a lot of A0 format patterns ever since!

So how do you get your sewing patterns printed at blueprintsprinting.com?  Here is quick step-by-step guide to uploading your patterns and placing your print orders:

1)  Create a free account on our site which comes with 500 MB of secure file storage on our cloud.  All you need is a valid email address.

2) Once your account is created, upload your sewing patterns for printing by simply clicking the Upload Your Document button from the Media Manager tab inside your account:

1

* You can upload multiple files at one time by either dragging them into the upload box, or clicking on the upload box and then selecting multiple files within a folder on your computer with your cursor.

2

3)  If your patterns are all the same size (A0 Format) we recommend the “Merge and upload as one file” button function for a much quicker and easier ordering process.  This way you will only have to enter you paper, size, and appearance preferences one time to place your order for all of the prints.  You will then need to give this new merged file a name….

5

4) Once your sewing patterns are uploaded, simply click the “Order” link next to the file name and select your print specifications:

Size:  Choose the option that is the same as, or one size up, from your original file size.  For A0 size files this means choosing the 36×48 option.

Paper:  20# is our regular 20 pound bond printing paper; the same as you would use in a home office printer. This is the most common choice for printing sewing patterns, but if you want your pattern in color, or just prefer a thicker sturdier paper, we also recommend 24# or 32#. Vellum is an opaque tracing paper type product and is another good option for sewing patterns.

Appearance:  Choose whether you would like your pattern printed in black and white, or in color.

Large Format Binding:  Binding is offered for plan sets printed for our construction and architecture clients.  Traditionally sewing patterns are ordered loose with “No Binding.”

2

 5)  If you have completed uploading all the files you would like to order, press the View Cart button to proceed to checkout and place your order.  If you need to upload, or order more files click on the Media Manager tab to return to the previous screen and repeat the process above.

6) Once you have all of the patterns you would like to have printed in your cart, you are ready to “Proceed to Checkout.” We charge a $7.00 print set up fee per order.  This covers downloading your files, setting them up in the print software, as well as boxing your prints up for shipping.  Shipping generally runs between $10.00 and $15.00 for our regular UPS Ground shipping depending on your zip code. We have expedited service available too for a little extra.

(Pro Tip:  Print more patterns at one time to save money on shipping and set up fees.)

Printing sewing patterns and having them delivered right to your doorstep has never been easier or less expensive!  Start your order today, or give us a call on our customer service line if you still have any questions.  We are always happy to help!

ARCH and ANSI Drawings, Printing Online

ARCH and ANSI are standard plan document sizes which we have centered our low cost print options around.  Some of our customers are not familiar with these architectural and engineering standards and often have questions for us regarding blueprint sizing.  Hopefully this blog post will help clarify some of that confusion.  We have an ARCH and ANSI (American National Standards Institute) sizing chart available on our Features Page.  We reproduce those here with their metric conversions:

North American ARCH Series Paper Size

SIZE INCHES MILLIMETERS
ARCH A 9 x 12 229 × 305
ARCH B 12 x 18 305 × 457
ARCH C 18 x 24 457 × 610
ARCH D 24 x 36 610 × 914
ARCH E 36 x 48 914 × 1219
ARCH E1 30 x 42 762 × 1067

ARCH sizes are generally preferred by North American Architects due to their small integer alternating aspect ratios (4:3 and 3:2) which correspond with most computer monitor displays, and the fact that they can a size can be cut in half to produce two sheets of a lower size – two sizes down.  Thus, providing an easy opportunity scaling up or down, and printing out of “half size” sheets.

By Schmidt455 - Own work, CC BY-SA 3.0, https://commons.wikimedia.org/w/index.php?curid=7173019

By Schmidt455 – Own work, CC BY-SA 3.0, https://commons.wikimedia.org/w/index.php?curid=7173019

North American ANSI Series Paper Size

SIZE INCHES MILLIMETERS
ANSI A 8.5 × 11 216 × 279
ANSI B 11 × 17 279 × 432
ANSI C 17 × 22 432 × 559
ANSI D 22 × 34 559 × 864
ANSI E 34 × 44 864 × 1118

ANSI sizes are more frequently used for engineering drawings and technical purposes.  One nice thing about the ANSI sizes is that a half size 17×22 set prints our perfectly on regular printer paper (8.5×11). The choice of paper size also often depends on the software used to create the plans.  For example Revit’s default size is ANSI D (22×34), whereas AutoDesk’s is ARCH D (24×36).

 Another paper sizing standard comes from the International Standards Organization (ISO) and is based of metric measurements in series A, B, and C.  The A series is by far the most commonly used.  We do print quite a lot of “AO” format documents.  These document are 841 by 1,189 millimeters (33.1 in × 46.8 in).  For A series documents we generally suggest choosing the next size up paper in our standard ARCH and ANSI paper size options.  So, for example, for an AO document you would choose our 36″x48″ option.  We will default to print-to-scale, so you don’t need to be concerned about the scaling being off.  Your drawings or images will be centered on the page and printed to the correct size and scale, unless you instruct us otherwise in the customer notes.

For more information about paper sizing and choosing between ARCH and ANSI drawing sizes, Archinect has a good discussion forum going.  AutoCad also has a discussion forum which can help you output your drawings to the desired size PDF.

We are also always happy to answer any questions, or help in any way we can.  Just give us a call!

From PDF to Print

Great news!  Our new multi-file upload and PDF merging/editing software is now complete and has been added to our web platform.  Our users are now able to upload multiple PDF files within a single folder in one easy step.  These multi-file uploads can then be merged into a single PDF for a much quicker ordering process.  PDFs, once uploaded, can also now be edited from our Media Manager to remove or reorder pages.

Multi-File PDF Upload & Merge

Here is a step-by-step guide on using the new upload process:

1)  From your Media Manager or account home page click the “Upload Another File” or “Upload Documents” button.  These will open up the upload dialog box where you can either drag PDF files, or click on the box to browse for files on your computer. (If you want to upload and merge multiple files all at once, make sure you have them organized and saved in a single folder for an easier upload process.)

2


2) Drag your PDF files into the upload box, or browse to the folder containing the files on your computer – you can select multiple files at once by clicking and dragging you cursor over the desired files, or by holding down the Ctrl or Shift keys while clicking the mouse over the file names in a windows system. (Only select files that are the same size, or that you will wanted printed to the same dimensions for the PDF Merge process.  If you try to merge files of different sizes you will receive a warning, you can still proceed by pressing the “Confirm Merge” button.)


3


3) Once you have all the files you wish to upload selected and in the upload box, you can choose to either “Merge and upload as one file” or “Save all as single files”.  (Merge files for easier ordering – if they are all the same type of file, and will be ordered for printing at the same time.  Save as single files if you anticipate ordering different files at different times, or to different specifications.)  You can also select the file type for each file (blueprint, spec book, or large color print).  The file type you select determines the print options you will have for that file. (If you select different file types for separate files in a merged document, our system will remember the file as the first file type selected.)

4


4) If you are merging files, after you press the “Merge and upload as one file” button you will need to give the newly merged PDF file a new name.

5) That is it!  Your files are now uploaded to your Media Manager for easy print orders.  You will soon also be able to share your construction documents with colleagues and subcontractors  – once we complete our Plan Room software module.  Stay tuned for the Plan Room to be released on the blueprintsprinting.com platform very soon!


Editing PDFs From Your Media Manager

 Once PDF files are uploaded, you now also have the ability to edit those items in your Media Manager.  You can reorder pages, remove pages, or merge multiple items right from you Media Manager as well.  Simply click the check box next to file/s that you wish to edit and then press the “Edit PDFs” button….

edit 1This will bring up a PDF handling box which give you all of the options of the upload box, in addition to options to remove, or rearrange pages.  To rearrange pages, simply hold down your cursor over a file you wish to move, and drag up or down….

edit 3

(If you leave the “Delete Originals” box checked it will remove the original files from your Media Manager after your merge or file editing.  You again have an options here to change the file type as well for different printing options  – Bluprint, Specbook, Proposal, or Large Color Print.)

Our customer service team is also always happy to help, if there are ever any questions or issues using this new software, just give our friendly team a call at  888-507-1002!

We answer the phones from 9am to 5pm Mountain Time, Monday – Friday.

Analyzing a Wide Format Printer Purchase

Wide Format Printers

Blueprintsprinting.com – Salt Lake City Print Floor

Many of our customers have told us how they have gotten rid of their plotters or wide format printers after finding out about our printing services and prices.  Depending how much wide format printing your construction, contracting, or architectural firm does, the ROI on a wide format printer just might not add up… especially when compared to the low-cost and convenience of doing your printing with blueprintsprinting.com.

Let’s take a look at some of the expenses you need to take into account when considering purchasing, or continuing to operate, a wide format printer:

Wide format printers come in a variety of brands and sizes.  For most engineering and construction industry purposes a 36″ wide format printer is the most common size.  A 36″ wide printer can handle the standard size architectural and engineering ANSI and ARCH print sizes.  Such printers come in two types: ink jet, and toner.  Toner printers have historically been the most commonly used in the Architecture, Engineering, Construction (AEC) industries because they print faster and handle large printing volumes better – great for black and white CAD drawings.  Toner printers have traditionally had a longer lifespan of 6-10 years, while ink jets historically have only lasted 3 -5 years.  This said, ink jet technology has improved significantly in recent years; making ink jet printing faster and less expensive.  Machines like the new HP PageWide printer allow for color or black and white printing on the same machine. Wide Format toner printers generally cost anywhere from about $11,000 up to $65,000.  The HP PageWide runs from about $25,000 for base model up. After the initial cost of purchase for a wide format printer, the next considerations are operating expenses, floor space, maintenance, and time spent on in-house print production.  Toner cartridges and ink cartridges can be very expensive and it is important to carefully review these costs and the efficiencey of printers in consideration before purchase.  Electricity and time are other important considerations. Most wide format printers have a 30 second or longer warm-up time, and can use a significant amount of electricity.  Wide format printers have a number of moving parts not too mention hardware systems that can wear out over time or be compromised by viruses and IT security breaches.  Final considerations are in-house time spent on print set-up, manning the machine, and floor space.  These are all significant expenses that often tend to get overlooked.

We are confident that when contracting, construction, architectural, and engineering firms carefully analyze all of the expenses associated with in-house wide format printing, and compare those costs with the prices for ordering their prints through blueprintsprinting.com, they will find that they just can’t beat our prices…. not to mention our convenience, speed, quality, or expanding industry focused software services.  We operate HP PageWides and top-of-the-line Oce printers in all our print facilities across the country. Our print floor teams have years of experience turning out quality monochrome and color prints quickly.  Why not let us handle the printing, so that your business can remain lean and focused on building and design?

To help with a more detailed analysis of wide format printing costs we have compiled a few good resources on the subject.  To learn more follow the links below:

Oce’s “Nine Considerations When Buying a Large Format Printer”

“Wide-Format Printer Maintenance”

“Plotter Technology Comparison”

“Is it Worth Buying a Large Format Printer?” (Geared toward photographers)

“So You Want a Large Format Printer”

Large Format Document Solutions

Jacob's New Ad_2From small to large quantities, Blueprintsprinting.com is your go-to for all types of large format document printing. We specialize in construction, architecture, engineering, and design-build documents, but we have also been known to print large format black and white photos for art gallery installations, window coverings, maps, model schematics, sanskrit scrolls for religious ceremony, flow charts, network diagrams, posters, banners, etc.  If it involves paper and ink, we can probably produce it.  Many of our customers have a few questions when ordering from us for the first time, or doing a new type of large format document print project.  So, we thought we would write up a post to address a few of those questions. Here are some particulars to keep in mind when choosing your paper, ink, and binding options:

PAPER

20# (20 lb.) – the most common paper bond for traditional black and white blueprints and other large format documents.

24# & 32# (24 lb. or 32 lb.)  – thicker bond papers, ideal for color large format documents.  Many of our clients opt for the 32# bond when printing color presentation blueprints, or proposal documents.  The thicker bond absorbs the color ink very well and makes for a very high quality finish on your color docs.

Tyvek – The ideal jobsite material!  Tyvek is a weatherproof and tear resistant material made from a textile and pulp blend.  Contractors and construction crews love it for the on site plan sets because it stands up to the rough and tumble rigors of any construction project.  These prints are virtually indestructible!  We also have had clients use our Tyvek print process for other large format document purposes, such as long lasting flow charts and diagrams to be hung on warehouse or manufacturing floors, network schematics, outdoor posters, etc.

Mylar – We offer Mylar in both a clear (completely translucent) and a frosted (more opaque) variety.  Mylar is printed using a laser process and is only available in black & white.  Our clients use Mylar prints for overlays, tracing, engineering drawings, and the like.  Mylar also works with dry erase markers, so you can mark these prints up and wipe them clean as needed without effecting the print at all.  Mylar is plastic type material so is tear resistant and quite durable.

Vellum – Similar to Mylar, but with an old world feel, Vellum is a vegetable based paper product.   Vellum is semi-translucent and has a plastic feel; it is durable, and is often also used for overlays, engineering drawings, or to give blueprints that nostalgic touch.  Vellum used be made from calf skin or other animal membrane and was widely used for blueprints.  It is less commonly used today, but we still have a number of clients who like the vellum print finish for certain large format documents.

Sizes

We offer our large format documents, as well as small format documents, in all of the standard engineering and architectural sizes, as well as in custom sizes.  In case you are new to these industries here is a brief explanation of standard sizing:

Engineering or Mechanical sizes as defined by American National Standards Institute:

ANSI A = 8.5″x11″ (Regular home office sized paper)

ANSI B = 11″X17″  (This also the half-size for ANSI D)

ANSI C = 17″x22″ (Half size of ANSI E)

ANSI D = 22″x34″ (Our most commonly ordered size for engineering drawings)

ANSI E = 34″x44″

Architectural Drawing Sizes:

ARCH A = 9″x12″ (1/3 size for ARCH E)

ARCH B = 12″x18″ (Half size for ARCH D)

ARCH C = 18″x24″ (Half size for ARCH E)

ARCH D = 24″x36″

ARCh E1 = 20″x42″

ARCH E = 36″x48″

For more info on the standard sizing and creating your CAD drawings in accordance with these standards here are a couple useful links:

Archtoolbox.com

AutoDesk Knowledge Network

We can also print custom size documents for a variety of special purposes.  As mentioned at the outset of this post, we have printed large format documents for almost as many  purposes as you can imagine. Give us a call to find out if we can help you with your custom project or visit our pricing page to see our prices per square foot.

Phone: 888-507-1002

What is Design-Build

The construction, architecture, and engineering industries have changed significantly over the past decade.  One of perhaps the most impactful changes shaking up these industries is the shift towards the design-build model of project delivery.  Design-build is a relatively new project managment system wherein the design and construction components are considered and calculated concurrently.  A design-build team works as a single entity, under a single contract. Design-build contracts reflect a shift in construction contracts towards having the project owner involved before construction even begins on the project.  The owner has a single contract with a design-build entity or contractor, and works hand-in-hand with that entity to design and construct their project. The designing and constructing entities are vertically integrated with one another.  This integration tends to increase efficiency on projects and gives the owner a single source for information, updates, and a clear place to go to request changes.  Finger pointing between contractors and designers is eliminated, and the buck stops with the design-build contractor. Under this new methodology multiple disciplines and subcontractors may have input into the design of a project.  The architect/designer is also more likely to put cost saving design elements into the project as he/she is under the same contract with the constructing entity. Design-build also allows for construction on projects to begin before the final design has been completed and approved.  Project owners who are on a tight timeline will find many advantages to the design-build model. Design and construction can take place simultaneously throughout the life of the project.  There is a lot of information available on the web about the shift to design-build and what it means for architecture, engineering, construction, and trades. For example, Korte has a number of excellent entries on  design-build on their blog.  The folks over at “the balance” have also written a good piece which outlines the advantages and drawbacks of the design-build model.  We encourage our clients to explore the pros and cons and consider how we can help them integrate their teams into a design-build framework…

DesignBuild v. Traditional

At blueprintsprinting.com we have many clients that still contract under the traditional design-bid-build model, and many others that have adopted the design-build model.  There is no one size fits all in the design and construction industries, and project owners, contractors, and architects all have to take many factors into account when deciding which project model to use.   We are designing our plan room software to easily facilitate multiple project completion methodologies.   When completed, this software will allow users to share plans and architectural drawings easily with project collaborators and owners, so in many way it will be a natural fit for the design-build model.  The industry networking component of blueprintsprinting.com will roll out soon thereafter making finding designers, builders, and subcontractors on platform easy.  The accompanying bid software will also allow project owners, architects, and contractors, to share their plans and drawing from our plan room and put the project (or pieces of the project) out for bid.  With blueprintsprinting.com account, it will be simple to share plans electronically or to send print hard copies to job sites, offices, and wherever else they are needed.  Already many of our clients are enjoying the benefits of being able to send blueprints and specs to multiple project collaborators in multiple locations around the country for a fraction of the cost of local print shops.